Geolocating a Photo: A Step-by-Step Method
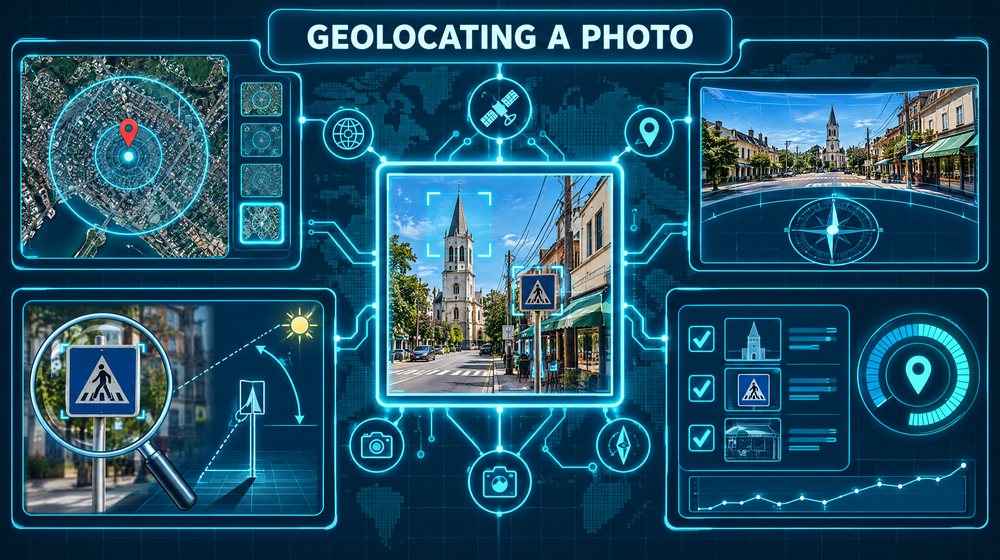
Geolocation is the work of determining where a photo or video was taken using what is visible in it. When the image carries no location metadata, which is the norm for anything shared on social media, the only evidence is the picture itself. Good geolocation is less about spotting one decisive clue and more about a disciplined process: inventory everything, narrow the search area step by step, and confirm the match against independent imagery before you say anything. This guide sets out that process and the habits that keep it honest.
Start with the purpose and the source
Before you study a single pixel, answer two questions.
Why are you geolocating this image? Verifying a news photo, checking whether a product listing was photographed where a seller claims, or confirming the location of a public event are all common and proportionate. Working out where a private individual lives is a very different matter, discussed in the ethics section below.
Where did the image come from? Record the URL, the account that posted it, the date it was posted and a capture of the post. Then check whether the image appeared earlier elsewhere. A reverse image search across more than one engine often reveals an older original, a higher-resolution copy, or a caption that already states the location. Starting from the earliest, largest copy saves hours and avoids geolocating an image that was recycled from somewhere else.
Also check for metadata. If you have the original file rather than a platform copy, EXIF data may include GPS coordinates. Most social platforms strip this on upload, and metadata can be edited, so treat any coordinates as a claim to verify, not an answer.
Step 1: Inventory every clue
The most common beginner mistake is fixating on the first interesting feature. Instead, work through the image systematically, foreground to background, left to right, and list everything you can see. Write it down. Zoom in on each region. A clue that seems irrelevant now may be the one that confirms a match later.
Group what you find into categories:
Text and language
- Script. Latin, Cyrillic, Arabic, Devanagari, Hangul, Thai and others narrow the search to regions immediately.
- Language within a script. Diacritics and letter combinations help. For example, ő and ű point to Hungarian, while ø suggests Danish or Norwegian.
- Business names, street names and house numbers. Even a partial name can be searched on maps.
- Phone numbers and web addresses. Country calling codes, area codes and country-code domains such as
.plor.brare strong regional clues. - Prices and currency symbols.
Infrastructure and road features
- Driving side. Parked cars, road signs facing traffic and lane arrows indicate whether traffic drives on the left (as in the UK, Ireland, Japan, Australia, India and South Africa) or the right.
- Road markings. In the United States and Canada, yellow centre lines separate opposing traffic. Much of Europe uses white centre lines, with exceptions such as Norway. Edge line styles, dash lengths and crossing patterns also vary by country.
- Signs. Shape, colour and typeface of road signs follow national standards. Many European countries base their signs on the Vienna Convention on Road Signs and Signals, which differ visibly from the North American system.
- Licence plates. Plates in most EU member states carry a blue band on the left with a country code. Plate shape and colour vary widely elsewhere.
- Utility poles, street lights, kerbs, bollards and guardrails. These are surprisingly regional, though learning them takes practice.
Architecture and built environment
- Building materials, roof shapes and pitch, window styles, balconies and shutters.
- Distinctive landmarks: towers, bridges, religious buildings, stadiums.
- Shopfronts and chain stores, which often operate only in certain countries.
Terrain and environment
- Vegetation. Palms, conifers, deciduous trees, cultivated crops and the state of foliage suggest climate and season.
- Terrain. Mountain ridgelines, coastlines, rivers and the colour of soil.
- Sun and shadows. Shadow direction can indicate which way the camera faced once you have a candidate location and approximate time.
Step 2: Rank the clues
Not all clues are equal. Rank each one on two questions: how specific is it, and how confident am I that I have read it correctly?
- High value: a legible, unusual business name; a unique landmark; a street sign with a full name.
- Medium value: language, driving side, road marking colour, a regional chain store.
- Low value: generic vegetation, common building styles, weather.
Start your search with the most specific clue you are confident about. Use the broader clues to constrain the area and the remaining clues to confirm the final match.
Step 3: Narrow the search area
Work from large to small. A typical sequence looks like this:
- Region or country from language, script, driving side and signage.
- Town or city from business names, phone area codes, regional chains or landmarks.
- Neighbourhood or road from street names, distinctive buildings and the layout of the scene.
- Exact camera position by matching the alignment of features in the foreground and background.
Several tools help at each stage:
- Map search. Searching a business name in Google Maps, Apple Maps, Bing Maps or OpenStreetMap often returns a handful of candidates.
- Feature queries. Overpass Turbo lets you query OpenStreetMap data for combinations of features, such as a pharmacy within 100 metres of a railway crossing. This works only where the features are mapped, so a negative result does not rule an area out.
- Elevation and terrain. Google Earth's 3D terrain lets you compare a mountain skyline in the image with the view from candidate locations.
Keep a log of every candidate you consider and why you rejected it. This protects against circling back to the same dead ends and shows reviewers that you tested alternatives.
Step 4: Confirm with satellite and street-level imagery
A candidate location is a hypothesis. Confirmation means finding several independent features in the image that match imagery of that location, in the right spatial relationship to each other.
Satellite imagery
Use satellite views to check the layout: road shapes, building footprints, field boundaries, the position of trees and the line of a coastline. Google Earth Pro on desktop has a historical imagery slider that lets you view older captures, which matters when the image may be several years old and the area has changed. Copernicus Browser offers free Sentinel-2 imagery that is lower in resolution but updated frequently.
Street-level imagery
Google Street View, Apple Look Around and the crowdsourced Mapillary service let you stand roughly where the camera stood. Line up the features: a doorway relative to a lamppost, the angle of a roofline against a hill, the order of shopfronts. Check the capture date shown with each panorama, because buildings, signs and businesses change.
What counts as a match
A good confirmation has several matching features, ideally at different distances from the camera, that would be unlikely to coincide anywhere else. One matching building is weak. A matching building, a matching sign position, a matching tree line and a matching ridge on the horizon, all aligned from one viewpoint, is strong.
Step 5: State your confidence
Report the location with an explicit confidence level and the evidence behind it. A practical scale:
- Confirmed: multiple independent features match satellite and street-level imagery from a specific viewpoint, with no contradictions.
- Probable: the location fits several features, but some could not be checked, often because imagery is old or coverage is missing.
- Possible: the area is consistent with the clues, but no specific match has been found.
Give coordinates for the camera position and, where useful, the direction it faced. Include side-by-side captures showing the matching features, annotated so a reader can follow your reasoning.
A worked example
Suppose a regional news desk asks you to verify a photo circulating online that claims to show flooding in a particular town. The post has no location data and the account is new.
Source checks. A reverse image search finds no earlier copies, which is consistent with the photo being recent but does not prove it.
Inventory. You list: water covering a two-lane road; cars parked on the right side of the road facing the camera; white dashed centre line; a bakery sign with a partial name ending in "...bäckerei"; a blue street sign with white text, partly obscured; a church spire in the background; steep wooded hills behind the town; terraced houses with steep tiled roofs.
Ranking. The German word on the bakery sign and the right-hand traffic point to a German-speaking area. The partial business name is the most specific clue. The spire and hills are valuable for confirmation.
Narrowing. The claimed town is in a German-speaking region, which fits. You search maps for bakeries in the claimed town and find four. Only one sits on a two-lane road with terraced houses opposite.
Confirmation. In street-level imagery from two years ago, you stand outside that bakery and look along the road. The terraced houses match in roof pitch and window spacing. The church spire appears in the same position relative to the rooftops. The ridgeline of the hills behind matches when you check the 3D terrain view. Satellite imagery confirms the bend in the road visible at the far edge of the photo.
Report. You state that the photo was taken from a specific point on that road, facing roughly north-east, with confirmed confidence. You add that geolocation confirms where, not when. Whether the flooding is current requires separate checks, such as weather records and other recent images of the same street.
Common mistakes and limits
- Anchoring on the claim. If a post says "this is Town X", you will be tempted to find Town X. Test the claim as one hypothesis among several and look for evidence against it.
- Stopping at one match. Many towns have similar churches, similar bakeries and similar hills. Insist on multiple independent features.
- Ignoring imagery dates. Street-level and satellite imagery can be years old. Missing features may simply be new or demolished.
- Mirror images. Images are sometimes flipped. Reversed text is the giveaway, but if no text is visible, consider whether the scene works mirrored.
- Edited or composite images. A real location can be combined with fake content. Geolocation does not verify that an image is unaltered.
- Treating absence in map data as evidence. OpenStreetMap and commercial maps are incomplete, especially in rural areas.
- Overstating precision. Say "within this block" if that is what the evidence supports.
Ethics and legality
Geolocation is powerful precisely because people do not realise how much a photo reveals. That creates a responsibility. Geolocating public events, infrastructure, news imagery and commercial claims is generally appropriate. Geolocating images of private individuals, especially images taken at or near a home, a school or a place of worship, can expose people to stalking, harassment or violence.
Before geolocating any image of a private person, ask whether you have a lawful purpose, whether you are authorized, and whether the result could put someone at risk. If the answer is unclear, do not proceed. Never publish the home location of a private individual, and do not share geolocation findings about private people outside the authorized process that requested them. When reporting public interest findings, consider blurring or omitting details that identify bystanders. Some organizations that publish geolocation work also delay or withhold precise coordinates where publication could endanger people on the ground.
Checklist
- Confirm a lawful, proportionate purpose before you start.
- Capture the source and run reverse image searches for earlier or larger copies.
- Check metadata, treating any coordinates as a claim.
- Inventory every clue: text, infrastructure, architecture, terrain, light.
- Rank clues by specificity and by how confidently you read them.
- Narrow from region to town to street to camera position, logging rejected candidates.
- Confirm with satellite and street-level imagery, checking capture dates.
- Require several independent features aligned from one viewpoint.
- State a confidence level, coordinates and camera direction, with annotated comparisons.
- Protect private individuals and bystanders in what you record and report.